📞Customer Service: +86 13248368268 📧servicecenter@suzhoufrank.com one year replacement and warranty!

Endoscopy Procedure: Step-by-Step Guide
Endoscopy procedure guide covering fasting requirements, medication management, sedation options, and the monitoring protocols used throughout the examination.
ENDOSCOPY
Dr Qi Rui
12/15/20258 min read
Knowing what happens during an endoscopy procedure takes away much of the anxiety. Most patients feel nervous before their first endoscopy. That's completely normal. But once you understand the process from start to finish, the whole thing becomes much less intimidating.
This guide walks you through every stage - from the preparation days before to the moment you head home. If you're wondering what is endoscopy and why you might need one, we've covered that in detail separately. This article focuses specifically on the procedure itself.
Before the Procedure: Preparation at Home
Your preparation starts well before you arrive at the facility. The specifics depend on which type of endoscopy you're having, but certain requirements apply across the board. Following these endoscopy procedure instructions carefully ensures the best possible outcome.
Fasting requirements
For upper endoscopy, your stomach needs to be empty. Most facilities require you to stop eating solid food at least 8 hours before the procedure. Clear liquids are typically permitted until 2 to 4 hours beforehand. The Mayo Clinic recommends beginning your fast at midnight regardless of when your procedure is scheduled.
For colonoscopy, the prep is more involved. You'll follow a clear liquid diet the day before and drink a bowel preparation solution that thoroughly cleanses your colon. This part isn't fun. But it's essential. If your colon isn't completely clean, the physician can't see the mucosal lining properly. That means potentially missed abnormalities.
Medication adjustments
Tell your physician about every medication you take. This includes prescription drugs, over-the-counter medications and supplements. Some need to be adjusted or temporarily stopped.
Blood thinners like warfarin, aspirin and clopidogrel often require discontinuation 5 to 7 days before the procedure. The bleeding risk during biopsy or polypectomy increases if these remain in your system. Your physician will provide specific guidance based on your situation.
Diabetic patients typically need medication adjustments since you'll be fasting. Don't make changes without consulting your care team first.
Arranging transportation
This one's non-negotiable. You cannot drive yourself home after a sedated endoscopy procedure. The sedation impairs your judgment and reflexes for several hours - longer than most people realize. Have a friend or family member ready to pick you up. Many facilities won't even perform the procedure without confirmed transportation arrangements.
Arriving at the Facility: Check-In and Pre-Procedure
Plan to arrive 30 to 60 minutes before your scheduled endoscopy procedure time. There's paperwork to complete and preparation to undergo before things get started.
Registration and paperwork
Staff will verify your identity and insurance information. You'll sign consent forms acknowledging you understand the procedure, its risks and benefits. If you have questions, this is the time to ask. Don't feel rushed.
Medical history review
A nurse will review your medical history. They'll confirm your current medications, ask about allergies and verify you followed fasting instructions. Be honest. If you accidentally ate something you shouldn't have, say so. It's better to reschedule than risk complications.
Changing and IV placement
You'll change into a hospital gown. Remove jewelry, dentures and eyeglasses. Then a nurse places an intravenous line in your arm. This IV delivers fluids and sedation medications during the procedure.
Some patients feel anxious at this point. That's okay. The staff does this every day. They're good at putting nervous patients at ease.
Sedation: What to Expect
Most endoscopy procedures use moderate sedation - sometimes called conscious sedation or twilight sedation. You're not fully unconscious like with general anesthesia. But you're deeply relaxed and likely won't remember much afterward.
Types of sedation
The American Society for Gastrointestinal Endoscopy outlines several sedation options:
Minimal sedation - You're drowsy but responsive. Can follow directions. Less common for GI endoscopy.
Moderate sedation - You may drift in and out of sleep. Will respond to verbal commands or light touch. Most common level for routine procedures.
Deep sedation - You're asleep and won't respond to verbal stimuli. May require more monitoring.
General anesthesia - Complete unconsciousness. Reserved for complex cases or patients who can't tolerate moderate sedation.
Medications used
Common sedatives include midazolam (a benzodiazepine) and fentanyl (an opioid). Propofol is increasingly popular because it works fast and clears your system quickly. Recovery times with propofol tend to be shorter than with traditional sedative combinations.
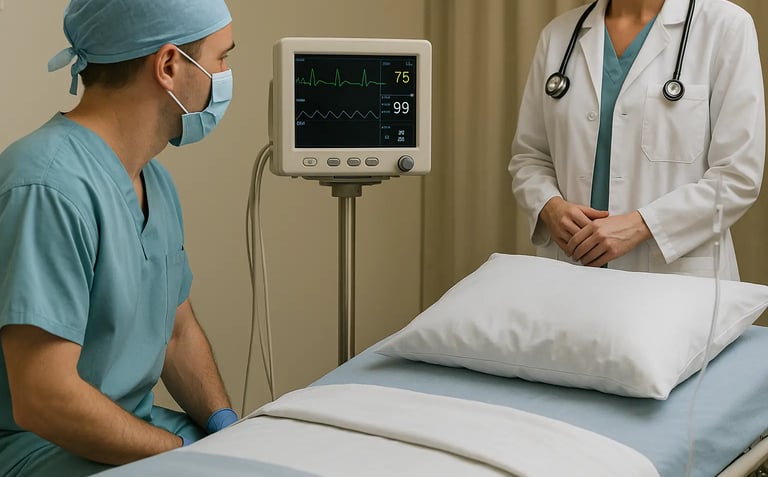
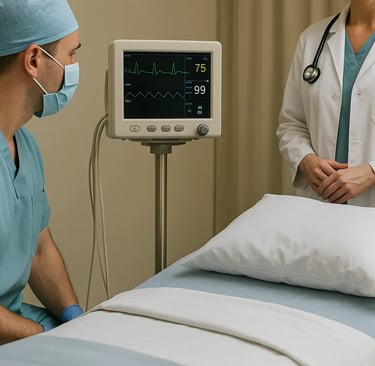
Your vital signs - blood pressure, heart rate, oxygen levels - are monitored continuously throughout the procedure. If anything changes, the team responds immediately.
The Examination: What Actually Happens
Now for the main event. What actually occurs during the endoscopy procedure once you're sedated?
Positioning
For upper endoscopy, you're typically positioned on your left side. A bite block goes between your teeth. This protects both your teeth and the endoscope as it passes through your mouth.
For colonoscopy, you also lie on your left side with knees drawn toward your chest. This position helps the physician navigate the scope through your colon.
Scope insertion
Once adequate sedation is achieved, the physician gently advances the endoscope. For upper endoscopy, the scope passes through your mouth, down your throat and into your esophagus, stomach and duodenum. You continue breathing normally throughout. The scope doesn't block your airway.
For colonoscopy, the scope enters through the rectum and advances through the entire colon. The physician may insufflate air or carbon dioxide to expand the colon for better visualization.
The equipment used
Modern endoscopy relies heavily on advanced imaging technology. The endoscope itself contains a high-resolution camera and LED light source that transmit real-time images to a monitor. Cleveland Clinic notes that today's scopes produce HD images capable of detecting abnormalities just a few millimeters in size. For a deeper look at how this endoscopy tech works, we've covered the basics separately.
The quality of the imaging equipment directly impacts diagnostic accuracy. Medical endoscope camera systems have evolved significantly. Current 4K camera technology provides exceptional clarity that helps physicians identify subtle mucosal changes. Many facilities now use ultra HD 4K medical endoscope cameras with integrated LED cold light sources for optimal visualization.
The light source matters too. Adequate illumination is crucial for examining the GI tract. Modern LED cold light sources provide bright, consistent lighting without generating excessive heat - important when the light is operating inside your body for extended periods.
For procedures performed outside traditional hospital settings - such as mobile screening units or outpatient clinics - portable endoscope camera units offer flexibility without sacrificing image quality. These compact systems make quality endoscopy accessible in more locations.
What the physician sees
As the scope advances, the camera captures continuous video of your digestive tract lining. The physician watches this feed on a monitor, looking for any abnormalities - redness, swelling, ulcers, polyps, masses, bleeding or structural changes.
The examination itself moves fairly quickly. A straightforward upper endoscopy might take only 10 to 15 minutes. Colonoscopy typically runs 20 to 40 minutes. More complex procedures or those involving therapeutic intervention take longer.
Biopsies and Photos: Documentation During the Procedure
If the physician spots something abnormal - or even something that looks normal but warrants closer examination - they'll take action right there.
Taking biopsies
Biopsy forceps pass through a channel in the endoscope. The physician positions these forceps at the target area and snips off a small tissue sample. You don't feel this. The sample gets placed in a specimen container for laboratory analysis.
Multiple biopsies are common. If you have Barrett's esophagus, for example, protocol calls for sampling tissue at regular intervals throughout the affected area. Don't be alarmed if your physician takes several samples. It's thorough practice, not a sign something's wrong.
Photographic documentation
The camera captures still images throughout the procedure. These photos become part of your medical record. They document what the physician observed and provide reference points for future examinations. If you have follow-up endoscopies, comparing images over time helps track changes.
Therapeutic interventions
Sometimes the procedure goes beyond diagnosis. If a polyp is found during colonoscopy, the physician typically removes it on the spot using a wire snare passed through the scope. Bleeding vessels can be cauterized. Strictures can be dilated. Foreign objects can be retrieved.
This dual diagnostic and therapeutic capability is one of endoscopy's greatest strengths. Many conditions get identified and treated in a single session.
Recovery: The First Hour
Once the endoscopy procedure is complete, the scope is withdrawn and you're moved to a recovery area. The sedation needs time to wear off.
Monitoring period
Nurses monitor your vital signs until you're fully awake and stable. This typically takes 30 to 60 minutes, though individual response to sedation varies. According to research published in PMC, average recovery time after sedated upper endoscopy is around 50 minutes, though factors like sedation dose and patient age influence this.
Common sensations
After upper endoscopy, your throat may feel scratchy or sore. This is normal. It fades within a day or two.
After colonoscopy, expect some bloating and gas. Air was pumped into your colon during the exam, and it needs to come out. Walking helps move things along.
Grogginess from sedation is expected. You might feel a bit foggy or unusually tired for the rest of the day.
Discharge criteria
Before you leave, you need to meet certain criteria. You should be awake, alert and oriented. Vital signs should be stable. You should be able to walk without assistance. And you need your arranged transportation ready.
The National Institutes of Health discusses standardized discharge scoring systems that facilities use to determine when patients are safe to leave. These typically assess consciousness, vital signs, nausea, pain and ability to ambulate.
Getting Your Results
Some findings are immediately apparent. Your physician may discuss what they observed before you leave - though keep in mind you might not remember this conversation clearly due to lingering sedation effects.
Preliminary findings
Gross findings - visible abnormalities like polyps, ulcers or inflammation - can be reported right away. The physician might tell you they found and removed a polyp, or that your stomach lining looked healthy.
Biopsy results
If tissue samples were taken, those require laboratory analysis. A pathologist examines the tissue under a microscope looking for cellular abnormalities - inflammation, dysplasia, malignancy, infection. This typically takes 3 to 7 business days. Sometimes longer if specialized testing is needed.
Follow-up communication
Most facilities contact you with biopsy results by phone. Or you'll have a scheduled follow-up appointment to discuss findings in person. Don't panic if you don't hear immediately. No news usually just means the lab is still processing.
If results show something concerning, your physician will explain what was found and outline next steps - whether that's medication, further testing, surveillance or referral to a specialist.
Recovery at Home: The First 24 Hours
Recovery continues after you leave the facility. Here's what to expect and what to avoid following your endoscopy procedure.
Activity restrictions
For the rest of procedure day:
No driving
No operating heavy machinery
No making important decisions or signing legal documents
No alcohol consumption
These restrictions exist because sedation effects last longer than most patients realize. Even if you feel fine, your judgment and reflexes aren't fully back to normal.
Eating and drinking
After upper endoscopy, start with soft foods and cool liquids. Avoid anything too hot or scratchy that might irritate your throat. By the next day, most patients resume normal eating.
After colonoscopy, start with light meals and advance as tolerated. Some cramping and gas are normal as your digestive system returns to its usual rhythm.
Warning signs
Contact your physician immediately if you experience:
Severe abdominal pain that worsens over time
Fever or chills
Persistent vomiting
Significant blood in your stool
Vomiting blood or dark material
Difficulty swallowing that doesn't improve
Chest pain
These could indicate complications requiring evaluation. Complications are rare, but prompt attention is essential when they do occur.
What Makes a Quality Endoscopy Procedure?
Not all endoscopies are equal. Several factors influence the quality and accuracy of the examination.
Physician experience
Higher procedure volumes generally correlate with better outcomes. Experienced endoscopists have higher detection rates for subtle abnormalities and lower complication rates.
Adequate preparation
For colonoscopy especially, prep quality dramatically affects what the physician can see. Poor bowel preparation is the leading cause of missed lesions.
Imaging technology
Equipment matters. High-definition cameras, adequate lighting and modern image processing all contribute to better visualization. Facilities that invest in quality medical endoscope camera systems and appropriate LED light sources give their physicians the best chance of detecting abnormalities.
Sufficient examination time
Rushing leads to missed findings. Quality guidelines exist for colonoscopy withdrawal time - at least 6 minutes for a normal exam - precisely because slower, more careful examination improves detection rates.
Final Thoughts
The endoscopy procedure is straightforward once you know what to expect. Preparation, check-in, sedation, examination, recovery - each step follows a predictable sequence. Most patients tolerate the procedure extremely well and are back to normal activities by the next day.
The temporary inconvenience is worth it. Endoscopy provides diagnostic certainty that imaging studies and blood tests simply can't match. And in many cases, it allows treatment during the same session.
If your physician has recommended an endoscopy, don't delay. Early detection of GI conditions consistently leads to better outcomes.
© 2025. All rights reserved.
About Us
Introduction
Development
Cooperation
Service
Main Products
Medical Grade Monitor
No 15, Jinyang road KunshanSuzhou, Jiangsu, China